
How to Build a Simple Wooden Bridge on a Budget
Look, I get it. You have a ditch. Or a small creek. Maybe just a muddy spot that turns into a swamp every time it rains. You’ve priced out those pre-fab bridge kits and almost choked on your coffee. Seriously—the cost is insane for what is essentially a few planks and some posts. But here’s the thing: you can build a solid, safe, and attractive simple wooden bridge without emptying your savings account. I’ve been doing this stuff for over a decade, and I’ve learned where you can cut corners and where you absolutely cannot.
This isn’t a guide for a suspension bridge or something that needs engineering stamps. This is for a functional, good-looking budget-friendly wooden bridge that will get you, your wheelbarrow, or your kids across a small gap for years to come. We’re talking spans of 6 to 12 feet, max. Anything longer and you’re into different territory (and a bigger budget). Let’s get into the real-world, pocket-friendly method.
Planning Your Budget-Friendly Wooden Bridge
Before you even touch a saw, you need to plan. And I mean really plan. The biggest mistake I see is people buying lumber before they understand what their span actually needs. Honestly? That’s how you end up with a wobbly death trap or a bridge that rots out in two years. Let’s avoid that.
Choosing the Right Wood for the Job
You’re on a budget, so you’re probably thinking, “I’ll just grab the cheapest pine at the big box store.” Slow down. Pressure-treated lumber is your friend here, but it’s not all created equal. For a simple wooden bridge that sits outside in the weather, you need ground-contact rated treated wood. It’s a bit pricier than the above-ground stuff, but the difference is five to ten years of lifespan. Seriously, the cost difference is maybe 15%. That’s a bargain.
What about cedar or redwood? Beautiful, yes. Cost-effective for a budget-friendly wooden bridge? Absolutely not. Stick with pressure-treated Southern Yellow Pine or Douglas fir. I’ve built decks and bridges with this stuff that have outlasted the house they were attached to. Another trick? Use 2x6s or 2x8s for the main joists, not 2x4s. Trust me, the extra inch or two in depth gives you way more strength per dollar than any fancy wood species will.
Designing for Simplicity and Strength
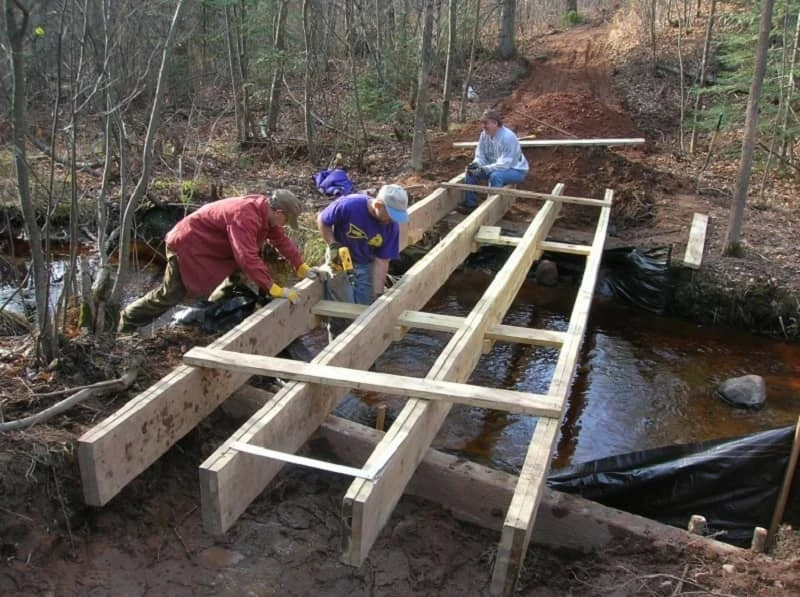
K.I.S.S.—Keep It Simple, Stupid. It’s a mantra I live by. The most reliable budget-friendly wooden bridge design is a simple “stringer” bridge. This means you place two or three main beams (the stringers) across the gap, and then lay decking boards perpendicular across them. That’s it. No complex arches, no trusses, no fancy joinery. Those things look cool, but they eat tools and time.
Think about your supports. You need something solid at each end. The ground will move, frost will heave, and water will flow. A concrete pier or a treated wood post set in concrete is the gold standard. I’ve seen people just rest the bridge on rocks—do not do this. It will shift, and you will fall. The span capacity of your bridge depends almost entirely on the size and spacing of those stringers. For a 8-foot span, two 2x8s on edge, spaced 2 feet apart, will carry a surprising amount of weight. For a 10-foot span, you want 2x10s or three 2x8s. It’s math, but it’s simple math.
The Step-by-Step Build Process
Alright, let’s get our hands dirty. You have your lumber list, you have your tools (circular saw, level, drill, shovel, measuring tape), and you have a solid plan. Here’s how we turn that pile of wood into a budget-friendly wooden bridge without wasting a single dollar.
Building the Foundation
First, dig your holes for the support posts or concrete piers. At each end of your span, you need two points of support. I like to use heavy-duty deck blocks on top of a compacted gravel base. It’s cheap, it’s fast, and it allows for drainage. A full concrete pour is stronger, sure, but for a light-use garden bridge? Deck blocks are totally adequate and a cornerstone of any budget-friendly wooden bridge project.
Place your blocks or pour your concrete so the tops are level with each other. Use a long 2x4 and a line level. If one support is an inch lower, your bridge will be a ramp. I can’t tell you how many times I’ve seen that. Once the concrete cures (or the blocks are set), we lay down the main stringers. These are your load-bearing beams. They should be on edge, not flat. Rest them directly on the supports and make sure they are perfectly level side-to-side. Tack them in place with a few screws to stop them from rolling.
Assembling the Deck and Railings
Now for the fun part. Cut your decking boards (I use 2x6s, but 5/4 decking works too) to length. Screw them perpendicular across the stringers. Leave a tiny 1/8-inch gap between each board for drainage and wood expansion. I use a 16d nail as a spacer—works like a charm. Deck screws are non-negotiable here. Nails will work themselves loose over time. Use two screws at each intersection for a rock-solid simple wooden bridge.
- Screw Pattern: Drive screws at a slight angle for extra grip. - Overhang: Let the decking boards overhang the stringers by about an inch on each side for a nice shadow line. - Railings: If your bridge is more than 2 feet off the ground, you need railings. For a budget build, use 2x4s for the top rail and 1x4s for balusters. Keep the balusters spaced no more than 4 inches apart (that code exists for a reason—kids’ heads). - Attachment: Bolt the railing posts to the outside of the stringers. Don’t just screw them into the deck boards. It won’t hold. - Final Touch: Seal the whole thing with a water-repellent stain. It’s a few extra bucks, but it’ll double the life of your budget-friendly wooden bridge.
Common Questions About How to Build a Simple Wooden Bridge on a Budget
What is the absolute cheapest wood I can use for a bridge?
Without a doubt, pressure-treated pine or fir from a lumber yard is the cheapest option that will actually last. Avoid untreated lumber like the plague. The cost difference is minimal, and the longevity gain is massive. If you're in a hurry and find a pallet of used 2x6s from a deconstruction site—grab it. That can be the heart of a very budget-friendly wooden bridge.
Do I need a permit for a small wooden bridge on my property?
This depends entirely on where you live. Honestly, it's better to check with your local building department than to assume you don't. Many rural areas don't require permits for small garden bridges that don't cross a public waterway. But if your bridge spans a drainage easement or is over a certain size (like over 12 feet or 30 inches above grade), you might need one. A quick phone call is worth the headache of a tear-down notice.
How long will a budget-friendly wooden bridge last?
If you build it right using pressure-treated wood and the supports are solid (not sitting in mud), you should get 10 to 15 years out of a simple wooden bridge before any major work is needed. The key is keeping the wood dry and off the ground. Good drainage, proper sealing, and annual inspections (looking for rot at the ends of the stringers) will extend that lifespan. I have one in my backyard that's pushing 18 years.
Can I build a bridge like this by myself, or do I need help?
For the planning and cutting? One person can handle it. For lifting and setting the main stringers? Get a friend. Those 10-foot 2x10s are heavy and awkward. Trying to balance them on supports while you're alone is a recipe for a pinched finger or a crooked bridge. The decking, railings, and finishing work are all one-person jobs. So, plan for about 80% solo work and 20% needing a spare set of hands for the heavy lift.
What is the biggest mistake people make when building a cheap wooden bridge?
Hands down, it's ignoring the foundations. People want to save a few bucks and skip the gravel base or the concrete piers. They think, “It’s just a little bridge,” and set the stringers directly on the ground. That works for about one season. Then the wood wicks up moisture, the ground settles unevenly, and the bridge becomes a teeter-totter. Invest your small budget in a solid base. It's the most important part of a budget-friendly wooden bridge that stays safe and level.
Na plus exclusive feature champion stats curated insights & stats based on your data directly on the champion build page try for free fully compliant with riot games Discover the best lol champion builds and guides using our tier list, based on the world's largest collection of lol game data. Build and battle your way to the top of the leaderboard and hone your skills in. W, a, s, d jump: Temukan build meta, buat strategi khusus, bandingkan statistik hero, dan bagikan keahlian anda dengan komunitas mobile. We are the defacto place to go when you want build something, anything in minecraft. Find compatible parts for the lowest prices and see how your build looks before you buy. Browse github repos and the build cli, featuring demos, sample apps, and code from sessions, so you can explore, learn, and build at your own pace. Take what you learn and turn it into something real. Buat, bagikan, jelajahi, bandingkan, analisis, dan simulasikan build mlbb!