
Tips for Softening Natural Sunlight for Outdoor Portraits
You’ve got the perfect location, a willing subject, and your camera dialed in. Then you step outside and the sun hits like a sledgehammer. Harsh shadows under the eyes. A shiny forehead that looks like a polished marble. That beautiful green background is now a blown-out mess. We’ve all been there. And honestly? It's the single most frustrating moment in outdoor portrait photography. The sun is free, abundant, and powerful—but without a few tricks, it’s also your worst enemy. So let me share what I've learned after a decade of wrestling with sunlight, from the deserts of Arizona to the overcast chaos of the Pacific Northwest.
These aren't theoretical tips. These are battle-tested, practical methods for softening natural sunlight that I use every single week. Let's fix that light.
Why Harsh Sunlight is Your Worst Enemy (and How to Fix It)
Direct overhead sunlight creates what we call high-contrast lighting. The dynamic range between your subject's bright highlights (like the tip of the nose) and deep shadows (under the chin or eye sockets) is simply too wide for most camera sensors to handle. You either blow out the highlights or lose all detail in the shadows. Neither option looks good. Softening natural sunlight isn't about reducing the amount of light—it's about changing the quality of that light.
The fix? You have to increase the size of your light source relative to your subject. Seriously. That's the core principle. A tiny point source (the sun) creates hard, defined shadows. A large, diffuse source (a cloudy sky or a scrim) creates soft, wrapping shadows. Everything we're about to discuss stems from this single physics lesson. So whether you use a $15 shower curtain or a $500 diffusion panel, your goal is always the same: make that sun bigger and softer.
The Problem with Midday Light
Let's get specific. Midday sun is roughly 90 degrees overhead. This creates raccoon eyes and unflattering nose shadows that stretch downward. It's the worst. Look—I've had clients show up at noon and expect magazine-quality headshots. It can be done, but only with the right approach.
First, never back your subject directly into the sun unless you want them squinting like they're looking into a lighthouse. Instead, position them with the sun behind or to the side. That's step one. Then you bring in your softening tools. Without them, you're just fighting a losing battle against physics.
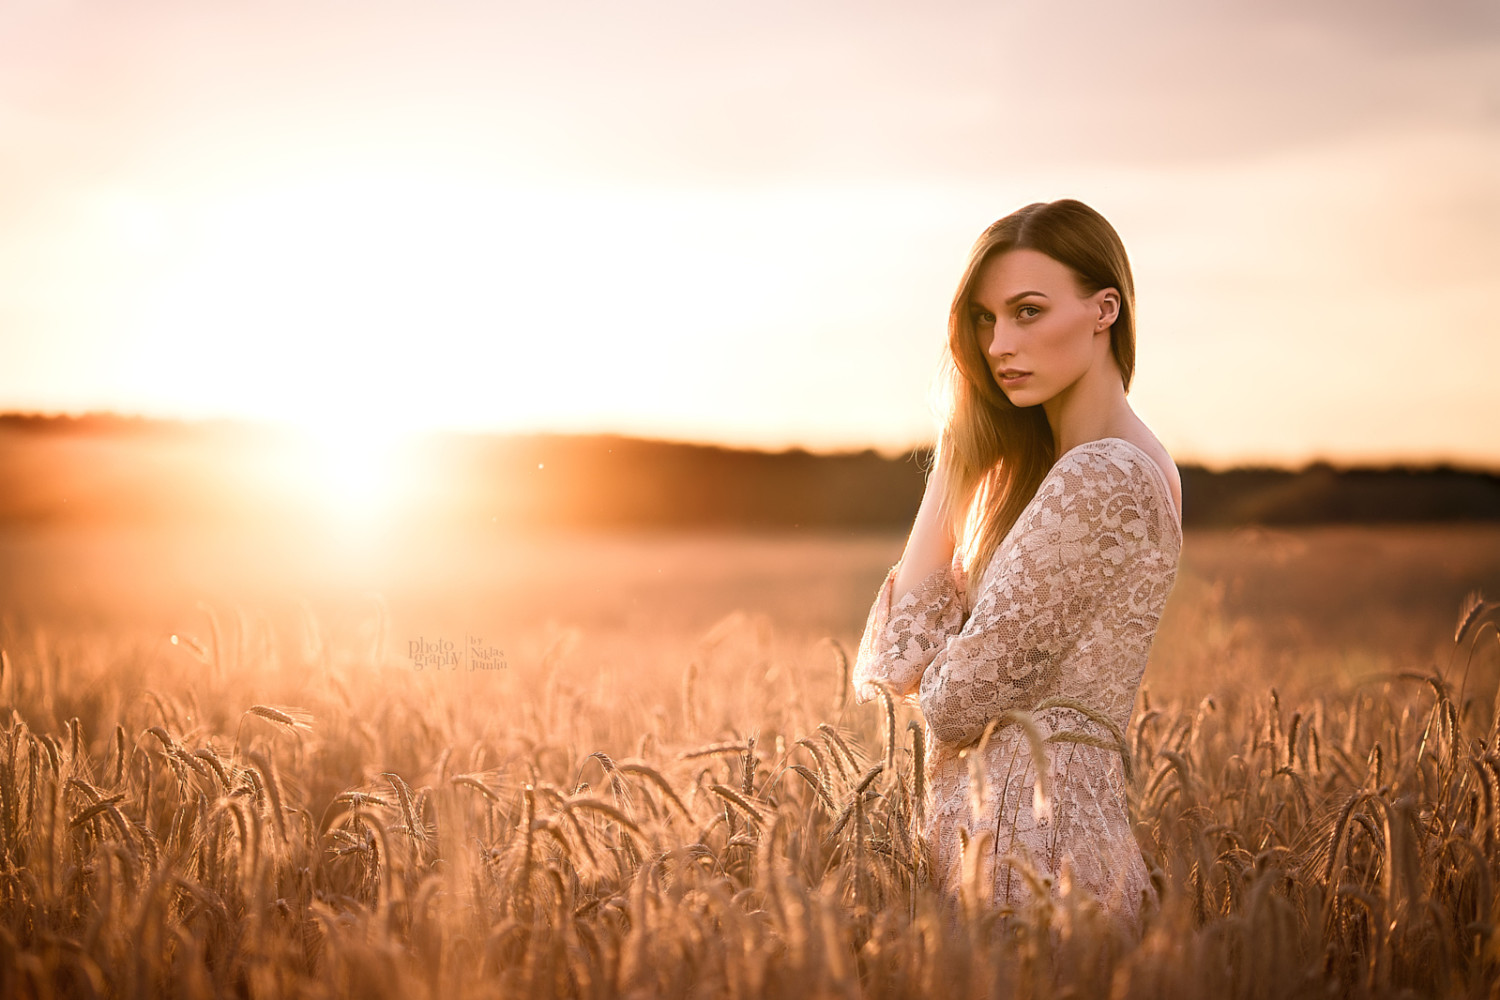
The Golden Hour Myth
I need to clear something up. Everyone talks about golden hour like it's the only time worth shooting. And sure, it's beautiful. But it's also fleeting, crowded with other photographers, and frankly—overhyped. You can create gorgeous, soft light at noon, at 2 PM, or even at high noon in the desert. You just need to know how.
The real advantage of golden hour is the low angle of the sun, which naturally wraps light around the subject. But that low angle also means you're fighting longer shadows. Honestly? I've shot some of my best portraits under a bright, overcast sky at noon. Why? Because the clouds are nature's largest diffuser. They are the ultimate tool for softening natural sunlight. Don't be a slave to the clock. Learn to work with whatever light you have.
The #1 Tool in Your Kit: Using a Diffuser Like a Pro
If you buy only one piece of gear for outdoor portraits, make it a 5-in-1 round diffuser. It's not glamorous. It looks like a giant frisbee. But I'm telling you, this single tool has saved more of my shoots than any lens ever could. A diffuser works by placing a semi-transparent fabric between the sun and your subject. This scatters the light rays, turning that harsh point source into a much larger, softer source.
The key is positioning. Hold the diffuser as close to your subject as possible without entering the frame. Why? The closer the diffuser, the larger the light source appears relative to your subject. This creates the softest possible light. If you hold it too far away, it shrinks into a small source again—and you're back to hard shadows.
Types of Diffusers and When to Use Them
- Round 5-in-1 diffuser (42-inch or larger): The workhorse. Perfect for headshots and half-body portraits. The silver and gold reflectors on the reverse side are bonuses for fill light. - Pop-up square diffuser: Excellent for group shots. They're easier to hold steady in wind and create a bigger coverage area. - Softbox-style diffuser (or a scrim with a frame): These are the heavy hitters. For professional shoots where you need consistent, wrap-around light, nothing beats a 4x4-foot or 6x6-foot scrim on a C-stand. Yes, it's a pain to set up. Yes, it's worth it. - DIY options: A white bed sheet taped to PVC pipes or even a white shower curtain can work in a pinch. I've used a white t-shirt held by an assistant. Desperate times, creative solutions. But for softening natural sunlight consistently, buy a proper diffuser.
Technique: The One-Arm Hold and the Assistant Factor
You can hold a diffuser with one hand and your camera with the other. I don't recommend it. Your arm will shake, you'll get tired, and the diffuser will drift. Always use a light stand or an assistant. If you have a friend or client's family member nearby, hand them the diffuser. Show them where to hold it. It's a team sport.
For solo shooters, a light stand with a sandbag is essential. Angle the diffuser so it blocks direct sunlight from hitting your subject's face. Sometimes you angle it straight overhead. Other times you hold it at a 45-degree angle from the sun. Experiment. Move it closer. Move it farther. Watch the shadow on your subject's nose. The moment that shadow softens and the edges blur, you've nailed it. That's the sweet spot.
Shadow Play: Using Nature and Architecture
You don't always need gear. Sometimes the best diffuser is a building, a tree, or even a covered porch. This is where scouting your location becomes critical. Walk around. Look for areas where the light naturally softens. A brick wall facing north will catch indirect, reflected light. A deep doorway creates a softbox effect. A wide tree with a dense canopy acts like a giant natural scrim.
The trick here is called 'open shade.' It's not total darkness. It's a shadowed area that still receives a lot of ambient light from the sky. Your subject stands there, the harsh direct sun is blocked, and the light that falls on them is soft and even. It's one of the fastest ways to achieve soft outdoor portraits without any gear at all.
Finding Open Shade in Any Location
- Large trees with full canopies: Look for trees that are not too high. A tall pine gives spotty light. A wide oak or maple creates a consistent umbrella of shade. - Building overhangs and covered walkways: These are goldmines. The light bounces off the ground or the wall opposite and fills in the shadows naturally. - The north side of any structure: In the northern hemisphere, the north side of a building never receives direct sunlight. This gives you consistent, soft light all day long. - Garages or open barns: The deep interior acts like a giant softbox. Position your subject near the opening, facing outward. The light wraps beautifully.
When the Shade Isn't Enough: Adding Directional Light
Sometimes open shade is too flat. The light is even, but it lacks dimension. That's when you bring in a reflector—or even better, a small LED panel. You're using the shade as your base exposure, then adding a touch of directional light to create contrast. This is advanced territory, but it's incredibly effective. The shade handles the softening, and the added light handles the shaping.
For example, place your subject under a large tree. The light is soft and beautiful on their face. But their eyes look a little dark? Have an assistant hold a small white reflector just out of frame, angled up toward their eyes. The reflected light catches the iris and adds that sparkle. Now you've got the best of both worlds: soft, shadowless skin with bright, engaging eyes.
Reflectors: The Unsung Hero of Soft Light
Reflectors get a bad rap. People think they create harsh light. And they can—if you use a silver or gold side too close or at the wrong angle. But used correctly, a reflector is a master tool for softening and redirecting sunlight. The key is to use the white side and to keep it soft.
The principle is simple. You take the hard sunlight that's hitting your subject from one direction, and you bounce it back from another direction. This fills in the shadows without creating a second harsh light source. The result is a gradual transition between light and shadow. That's the definition of soft light.
White vs. Silver vs. Gold vs. Translucent
- White reflector: Your go-to for soft fill. It doesn't add a lot of light, but it adds the right kind of light. Gentle, diffused, natural. - Silver reflector: Use with caution. It adds a very bright, specular highlight. Great for catchlights in the eyes, but terrible for skin texture if you're too close. Back it up at least 6-8 feet from the subject. - Gold reflector: Adds warmth. Beautiful for golden hour or sunset portraits. But it can look unnatural in midday light. Use sparingly. - Translucent (the diffuser side): Not technically a reflector, but it's often included in the 5-in-1 kit. This is your primary diffusion tool for blocking sunlight.
The Feathering Technique for Natural Results
Here's a pro tip that most beginner guides skip. Don't point the reflector directly at your subject like a searchlight. Instead, use what's called feathering. Angle the reflector so that only the edge of the reflected light hits your subject. This creates a very soft, gradual fill. It mimics the natural light of a large, cloudy sky.
For example, if your subject is in open shade and the light is coming from the left, place the reflector on the right, angled slightly away. The bounce will wrap around their face instead of slamming into it. The difference is subtle but profound. Your portraits will look lit by ambient light, not by a clumsy bounce card. Master this, and you'll never shoot a harsh portrait again.
The Secret Weapon: The Scrim
Let me tell you about my favorite piece of gear. It's not a lens. It's not a camera body. It's a 6x6-foot scrim on a C-stand with a sandbag. A scrim is essentially a large, stretched piece of diffusion fabric on a metal frame. It's the difference between good portraits and great portraits.
You set it up between the sun and your subject. It turns the entire area behind it into a giant softbox. The light hitting your subject is now the same quality as light coming through a large window. It wraps. It flatters. It makes skin look seamless. Softening natural sunlight with a scrim is the closest you'll ever get to studio-quality light outdoors.
Why a Scrim Beats a Handheld Diffuser
A handheld diffuser covers one person well. A scrim covers a family of five, a couple, or even a car if you're shooting automotive. The size of the light source is dramatically larger. And as we keep saying, larger source equals softer light. A scrim also frees up your hands and your assistant. You set it up, you sandbag it, and you forget about it. You can walk around, change angles, and your light stays consistent.
The downside? It's heavy. It's expensive if you buy a quality brand. It takes time to set up. And on a windy day, it can become a giant sail capable of pulling down your stand. I've seen C-stands fly. It's not funny. Always use extra sandbags and never leave the rig unattended. But when the conditions are right, a scrim is magic.
DIY Scrim Alternatives That Actually Work
Don't have a pro scrim? No problem. You can build one for under $40. Buy a roll of white ripstop nylon from a fabric store. Stretch it over a PVC frame you build yourself. Use shock cord to tension the fabric. It won't last as long as a commercial product, but it will work for a dozen shoots. I used a DIY scrim for two years before I saved up for the real thing.
Another alternative: a large pop-up canopy tent with a white cover. These are common at outdoor markets. You can buy a 10x10-foot canopy for about $100. The white top acts as a massive diffuser. Set it up over your subject and shoot from underneath. The light will be incredibly soft and even. It's not the most elegant solution, but for family portraits or events, it's a lifesaver.
Common Questions About Softening Natural Sunlight for Outdoor Portraits
What is the best time of day for soft outdoor portraits?
While golden hour (the hour after sunrise and before sunset) is famous for its warm, soft light, it's not the only option. An overcast day at any time provides the softest natural light imaginable. If you need to shoot at noon on a bright day, use a diffuser or seek open shade. The time matters less than your technique.
Can I use a white bed sheet as a diffuser?
Absolutely. A white bed sheet is a surprisingly effective DIY diffuser. Stretch it over a frame, or have two assistants hold it taut. It will scatter the sunlight and create a soft, flattering light. Just make sure the sheet is clean and free of wrinkles. And be careful on windy days—a sheet acts like a big sail.
How close should I hold the diffuser to my subject?
As close as possible without entering the frame. The closer the diffuser, the larger the light source relative to your subject, and the softer the light. If you hold it too far away, it shrinks into a small point source again, and you lose the softening effect. For a headshot, six to twelve inches above the subject's head is often ideal.
What's the difference between a diffuser and a reflector?
A diffuser goes between the sun and your subject to block and scatter harsh light. A reflector redirects existing light onto your subject from another angle. They are complementary tools. Use a diffuser to soften the main light, and a reflector to fill in shadows. Many photographers use both simultaneously for professional results.
Do I need expensive gear to soften sunlight?
No. The most important tool is your understanding of light. Find open shade, use a tree, shoot on an overcast day, or use a simple DIY diffuser. Expensive gear makes the process easier and more consistent, but it doesn't replace skill. Start with what you have, practice the principles, and upgrade when your technique demands it.
The best light you'll ever use is the light you learn to control, not the light you spend thousands of dollars chasing. Take these techniques, go outside, and make that harsh sun work for you.