
You know that sinking feeling when you’ve spent three hours trying to set up a temporary antenna or observation platform, only for your commercial mast to wobble like a wet noodle in a light breeze? I’ve been there more times than I care to count. After over a decade of field work—from emergency communications rigs to remote sensing projects—I learned that off-the-shelf masts are rarely built for the real world. They are either too fragile or criminally overpriced.
So, I started building my own. And honestly? It was one of the best professional decisions I ever made.
This DIY guide to building a heavy-duty telescoping mast will walk you through the exact engineering principles, material choices, and assembly methods I’ve used for years. We’re not talking about a flimsy flagpole here. We’re talking about a rugged, multi-section tower that can hold a substantial payload at serious height without folding in on itself like a cheap lawn chair.
Seriously, let’s get our hands dirty.
What Does “Heavy-Duty” Actually Mean for a Telescoping Mast?
Before you buy a single aluminum tube, you need to understand the forces at play. A telescoping mast isn’t just a set of nested pipes. It’s a mechanical system under constant stress. The term “heavy-duty” in this context refers to three specific things: load capacity, structural rigidity, and resistance to buckling.
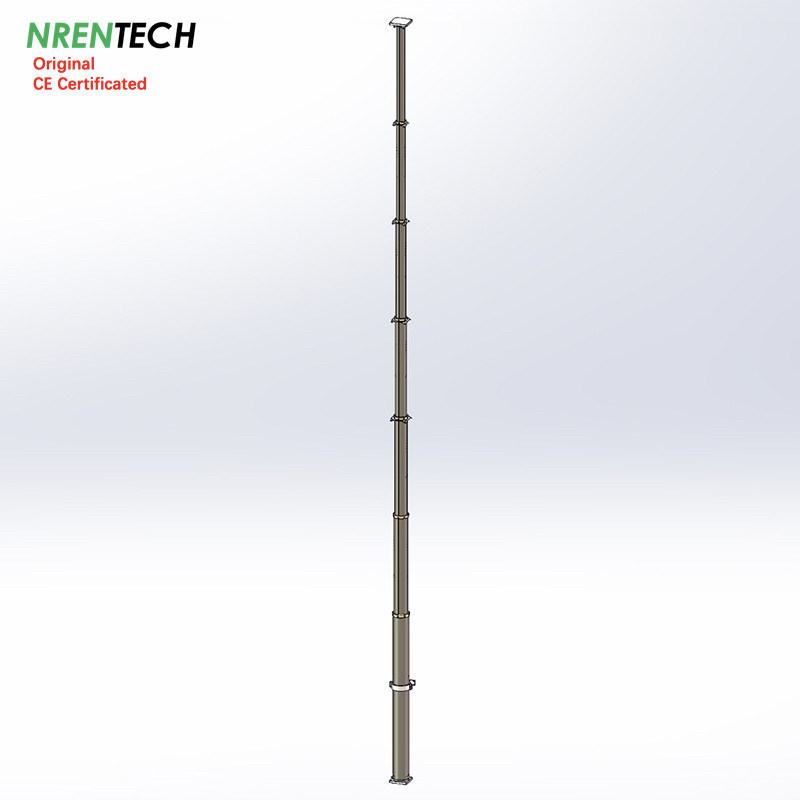
Look—a mast that holds a 5-pound weather sensor at 20 feet is a different beast from one that needs to support a 15-pound antenna array or a heavy-duty lighting fixture. The heavy-duty telescoping mast we are building will focus on a payload capacity of roughly 30 to 50 pounds, with a fully extended height of 30 to 40 feet. That is a realistic, highly useful sweet spot for field communications, surveying, or film production.
It’s a big deal to get this right. A failure at height isn’t just an inconvenience; it’s a safety hazard and a project killer.
Load Capacity vs. Safety Factor
Engineers use something called a “safety factor.” For a permanent installation, you might use a factor of 2:1. For a DIY mobile mast that gets assembled and disassembled frequently? I wouldn’t go below 4:1. That means if you plan to lift a 30-pound load, your DIY mast should structurally handle 120 pounds without permanent deformation.
This isn’t an exaggeration. Wind loading multiplies forces exponentially. A steady 20 mph breeze on a 10-square-foot antenna at 30 feet height creates a lateral force that can exceed your payload weight. Heavy-duty telescoping mast designs must account for this dynamic load, not just the static weight sitting on top.
Honestly, the biggest mistake I see beginners make is focusing only on compressive strength (the weight pushing down) and forgetting entirely about the bending moment at the base. That is how you end up with a bent mast on your second deployment.
Wall Thickness and Tube Diameter: The Non-Negotiables
You cannot cheat on tube specification. For a telescoping mast, the bottom section (largest diameter) is your foundation. I recommend starting with a base tube of at least 2.5 to 3 inches outer diameter with a wall thickness of 0.125 inches (1/8 inch) for the bottom section.
Each subsequent section should have a diameter that is roughly 0.25 to 0.5 inches smaller, with a wall thickness that can step down slightly to 0.095 inches for the upper sections. This keeps the weight manageable while maintaining the needed stiffness. Trust me on this one: thinner walls on the top sections save weight without sacrificing structural integrity, but the base section must be a tank.
The Core Design: Materials and Locking Mechanisms
Now that we know the structural demands, we need to talk about the anatomy of the build. A DIY heavy-duty telescoping mast has two critical components: the tube material and the locking mechanism. Skimp on either, and you’re building a liability.
Aluminum vs. Fiberglass: The Material Debate
For most applications, I default to 6061-T6 aluminum. It offers an excellent strength-to-weight ratio, it’s corrosion resistant, and it’s readily available in telescoping configurations. You can find pre-cut tubes from online metal suppliers or even local surplus yards.
Fiberglass is an option if you need electrical isolation (like for an antenna that shouldn’t be grounded) or if you are operating in highly corrosive environments like saltwater coasts. However, fiberglass is heavier for the same strength and more difficult to machine precise collars for.
For our heavy-duty telescoping mast, go with aluminum. It’s easier to work with, and you can weld or bolt custom brackets to it without worrying about delamination.
The Locking Mechanism: Pin vs. Twist-Lock
This is where the rubber meets the road. How do you keep the extended sections from sliding back down?
- Pin locks: Simple, reliable, and cheap. You drill holes through both tubes at set increments and insert a stainless steel pin. This is the most secure method for a heavy load. It is also the most tedious to adjust height incrementally. - Twist-lock collars: These use a tapered collet or a split-ring compression system. They allow infinite adjustment between stops. They are faster to use but can slip if the surfaces get dirty or if the collar quality is poor.
For a DIY guide to building a heavy-duty telescoping mast, I strongly recommend a hybrid system: use a twist-lock collar for the bottom two sections (where the loads are highest and you want quick adjustment) and a pin-lock system for the upper sections where precision is less critical but security is paramount.
Look—I’ve seen twist-locks fail on a cold morning when the aluminum contracted just a hair. Pin locks don’t care about temperature. Use them for the critical upper joints.
Step-by-Step: Building Your Own Heavy-Duty Mast
Alright, let’s get into the actual build. This is not a puzzle. It’s a sequence of precise cuts and careful assembly. I’ve broken it down into a clear, repeatable process.
What You Will Need (The Uncompromising List)
- Tubing: 4 sections of 6061-T6 aluminum. Base: 3″ OD x 0.125″ wall. Second: 2.5″ OD x 0.125″ wall. Third: 2″ OD x 0.095″ wall. Top: 1.5″ OD x 0.095″ wall. Length of each: 10 feet. - Locking collars: Two heavy-duty twist-lock collars for the 3″ to 2.5″ and 2.5″ to 2″ joints. - Hardware: Stainless steel bolts (1/4″-20), lock washers, and threaded inserts for pin holes. - Tooling: A drill press with a sharp bit, a tap and die set, a deburring tool, and a file. - Base plate: A 12″ x 12″ x 1/2″ steel plate with a receiver tube welded in the center.
Honestly, do not substitute the base plate. A flimsy base makes the whole mast a hazard.
The Assembly Sequence
1. Cut and Deburr: Cut each tube to the exact length. Ensure the ends are perfectly square. Use a deburring tool to remove all sharp edges. A sharp edge will tear through gloves and skin. 2. Fit Check: Slide the tubes together. The second section should slide into the first with about 1/16″ of radial clearance. Too tight, and it will bind. Too loose, and it will wobble. 3. Install the Twist-Lock Collars: These typically clamp around the outer tube. Follow the manufacturer’s instructions for shimming if needed. Do not overtighten—you can ovalize the tube. 4. Drill Pin Holes: For the top two sections (2″ to 1.5″), drill a series of holes spaced 12 inches apart through both tubes. Use a drill press to ensure they are perfectly aligned. A misaligned hole means a sloppy lock. 5. Install Threaded Inserts: Tap the holes in the inner tube and install stainless steel threaded inserts. This prevents galling between the aluminum and the pin bolt. 6. Mount the Base: Weld or bolt your receiver tube to the base plate. This receiver should be slightly larger than your base tube (3.25″ ID) so the mast slides in easily.
It is that sequence. No shortcuts.
Getting the Height Right: Calculating the Extension
A common question I get is how to calculate the final height. It’s simple geometry, but people screw it up constantly.
Each tube is 10 feet long. If you have four sections, the total collapsed length is roughly 10 feet (plus the hardware). The fully extended length is not 40 feet. Seriously, it isn’t.
Because each section overlaps by at least 1.5 feet to maintain stability, your usable length is significantly less. With a 1.5-foot overlap per joint (three joints), you lose 4.5 feet of height. Your telescoping mast will extend to about 35.5 feet. Plan your project accordingly. If you need a full 40 feet, buy 11-foot sections or add a fifth, thinner section.
Guying the Mast: Non-Negotiable Above 25 Feet
I don’t care how beefy your base plate is or how heavy your locking collars are. Above 25 feet, wind will make your heavy-duty telescoping mast sway like a drunk giraffe.
You need guy lines. Period.
Use three or four lines at 120 or 90-degree intervals. Attach them to a collar or a dedicated ring at the 20-foot marker (about two-thirds up). Anchor them with ground stakes or sandbags. This triangulation turns your flexible mast into a rigid tower.
Honestly, I’ve seen a 30-foot mast snap at the base during a sudden gust. The guy lines would have saved it. Don’t be the cautionary tale.
Troubleshooting Common DIY Mast Failures
Even with a solid build, things can go wrong. Here are the three most common issues I’ve encountered in the field and how to fix them before they ruin your deployment.
Stuck Sections (The Bind)
If your tubes slide smoothly when clean but bind after a few cycles, you likely have a burr on the inside edge of the outer tube or the outside edge of the inner tube. Fix it immediately. Running a file over the offending edge or using a flap wheel sander will restore the smooth action.
A bound section is dangerous. If it releases suddenly under load, it can drop your equipment or injure your hands. Keep the sliding surfaces lightly lubricated with a dry graphite spray. No oil—it attracts dirt.
Locking Collar Slippage
This usually happens when the collar’s inner surface is too smooth or the tube has a film of oxidation. Clean both surfaces with isopropyl alcohol and a scouring pad. If the collar still slips, you need to adjust the compression ring. Some collars have a set screw that controls the collet’s grip. Tighten it 1/8 turn at a time until it holds.
If you’ve maxed out the adjustment and it still slips, buy a better collar. I don’t mean to sound dramatic, but a slipped collar at 30 feet is a terrifying experience. Invest in quality.
Common Questions About the DIY Guide to Building a Heavy-Duty Telescoping Mast
Can I use Schedule 40 steel pipe instead of aluminum?
The short answer is yes, but you absolutely will not enjoy it. Steel is roughly three times heavier than aluminum for the same size. A 40-foot telescoping mast made of steel would require a winch and a buddy to lift. It is durable but impractical for field use. Stick with 6061-T6 aluminum as recommended.
How do I transport a 10-foot collapsed mast?
This is a logistical detail that catches people off guard. A 10-foot tube bundle doesn’t fit in a standard SUV easily. I recommend building a roof rack platform or using a trailer. Alternatively, consider using a 5-foot base section combined with a 5-foot extension piece that you assemble on site. It adds complexity but solves the transport issue.
What is the maximum height I can safely reach without a permit?
Regulations vary wildly by location. In most places, a temporary structure under 35 feet that is not permanently attached to the ground does not require a building permit. However, you still need to check local zoning and FAA regulations if you are near an airport. I always advise checking before you deploy. The fines are not worth the risk.
Can I use a winch to automatically extend the mast?
Absolutely, and I highly recommend it for a heavy-duty telescoping mast over 30 feet. A manual crank or electric winch system uses a cable that runs through a pulley at the top section. As you retract the cable, the sections stack up. This is the standard for professional masts. You will need to reinforce the top section with a cable guide. It is a more advanced build, but it dramatically increases ease of use.
How do I insulate the mast for electrical safety?
If you are mounting an antenna or any electrical device, you need to consider grounding and isolation. Use a nylon or Delrin bushing at the base where the mast meets the receiver tube. This breaks the electrical path to ground. Alternatively, use a fiberglass top section for the last 5 feet. Do not skip this if you are working near power lines or lightning-prone areas. It is a safety essential.
Building your own telescoping mast is a serious project that rewards careful planning over raw strength. The design I’ve outlined here has served me through harsh desert sun, coastal salt spray, and freezing mountain winters. It is not a weekend hobby build. It is a professional tool you construct with your own hands. Take your time, measure twice, and lock it tight.